| ||
| Map Name | ||
|---|---|---|
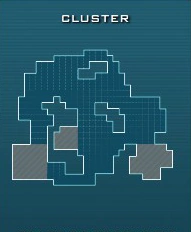
| Cluster | ||
| Region | Stage Number | |
| Coastline | << 5 - 1 >> | |
| Waves | ||
| 10 | ||
| Starting Resources | Resources per Wave | Total Resources |
| 500 | 400 | 4100 |
| Tower Bases in Field | Starting Tower Bases | Total Tower Bases |
| 0 | 20 | 101 |
Overview[ | ]
- Cluster is the first DLC map in the game and the first one to include Mutators & Healers among the enemies.
- The game starts with 500 Resources & 20 Tower bases.
- The reward after each wave is 400 resources & 9 tower bases.
- The game has green pulsing "Clusters" (looking like green hanging plants) across the higher points in the map. They can be shot and when they fall, they explode, dealing 6000 damage to affected lumes. The explosion range is 2 grid squares. They recharge 15 seconds after being shot. When the player spawns and walks for the first time around the map to create a maze, the clusters around him fall and explode automatically, which occurs only once in the very beginning.
- In this map the player can get fainted if he falls into the deeper waters.
Enemies[ | ]
Wave 1[ | ]
| Center | East |
|---|---|
| 2 x Walker Warrior | |
| 1 x Healer | |
| 2 x Mutator |
Wave 2[ | ]
| Center | East |
|---|---|
| 8 x Screamer | |
| 3 x Mutator |
Wave 3 (1:00 Time Limit)[ | ]
| Center | East |
|---|---|
| 2 x Walker Warrior | 3 x Soaker |
| 3 x Healer | 24 x Runner |
Wave 4[ | ]
| Center | East |
|---|---|
| 8 x Screamer | 2 x Mutator |
| 6 x Soaker |
Wave 5[ | ]
| Center | East |
|---|---|
| 3 x Soaker | 16 x Brood Mother |
Wave 6 (1:00 Time Limit)[ | ]
| Center | East |
|---|---|
| 5 x Mutator | 3 x Armoured Heavy |
| 6 x Healer |
Wave 7[ | ]
| Center | East |
|---|---|
| 6 x Hoverer | 6 x Screamer Matriarch |
| 6 x Screamer |
Wave 8[ | ]
| Center | East |
|---|---|
| 2 x Walker Warrior | 20 x Snorker |
| 10 x Walker | 5 x Mutator |
| 3 x Mutator |
Wave 9 (1:00 Time Limit)[ | ]
| Center | East |
|---|---|
| 16 x Walker Pup | 10 x Rhino |
| 5 x Mutator | 2 x Mutator |
Wave 10[ | ]
| Center | East |
|---|---|
| 22 x Screamer Matriarch | 4 x Armoured Heavy |
| 12 x Snorker | 6 x Healer |
Trivia[ | ]
The map has some Easter eggs (link in Youtube: [1])
Notes & tactics[ | ]
- While being among the easier DLC maps, Cluster has some tricky things, mainly related to the Mutators. Since they can make enemies very durable, along with prioritizing them whenever posible, it is wise to have damage towers closer to the spawn points, to kill them faster without allowing them to make average or heavier enemies overpowered. Area-of-effect towers such as the ACP and towers that can deal high or burst damage quickly like Lightnings are potent against them. Focus also is capable, but it lacks burst and can target only one enemy at a time until it gets killed, which may not always be a Mutator. Focus towers here perform better if used along with overcharge and/or support towers like the Range spire, Amp & Slow fields/Kairos. Damage towers usually are better if set to least health when there are Mutators, in order to kill them faster and therefore prevent mutations. In Campaign mode core-oriented builds and core perks tend to be less effective when there are Mutators, because enemies might mutate too much before they reach the damage towers.
- The other new type of enemies, the Healers are usually not even half as dangerous, but they are also good to prioritize, since weapons and towers cannot always overcome the healing that they give to lumes. The Anti-air tower is very potent and a single one can kill all the Healers in this map (a level 3 one, with or without overcharge, depending on the number of players & difficulty).
- Due to reasons, mentioned above, the 6th wave can easily become a big threat if the player is not prepared. Healers can target both Mutators & Super Heavies, while same is valid for the Mutators to the other two types of lumes and if the player is not prepared, this might lead to a group of enemies, very difficult to deal with, especially in higher difficulties. However, there is a relatively easy way to deal with the threat in this wave - Mutators cannot damage the core, so, depending also on the build, they can safely be sent to travel very far away from the other enemies until they reach them, while the Super Heavies and the Healers are getting killed with the towers in weapons and this is one way of potentially even preventing any mutations. If the three Armoured Heavies die, then all remaining Mutators & Healers die automatically, since they cannot damage the core.
- The Range spire can buff other towers, allowing them to also target & kill faster the Mutators & the Healers from further
- Weapons that have area-of-effect fire modes are good for this map (e.g. Rex, Plasma rifle, Battle rifle, ETK-tesla prototype)
- If being close to Hoverers, it is good to be careful if there are deep waters in proximity, since then there is a bigger risk the player to be thrown into them, getting fainted
- Since the only flying lumes are Healers and their healing loses its impact over time, a properly set build in the Survival mode could easily function without Anti-air, ignoring the healing lumes.
Video playthroughs with links, towers, modes & results[ | ]
- [link] - with 12 Lightnings, Amp, Range spire & Anti-air; 5 Feats of Strength; undamaged core
- [link] - with 4x Focus, Amp, Kairos & Anti-air; 5 Feats of Strength; undamaged core
- [link] - with AR mines (2 dispensers), Range spire, Slow fields (2 dispensers) & Anti-air; 5 Feats of Strength; undamaged core